
Assembling an Adirondack chair
Twenty minutes. A drill makes it ten.
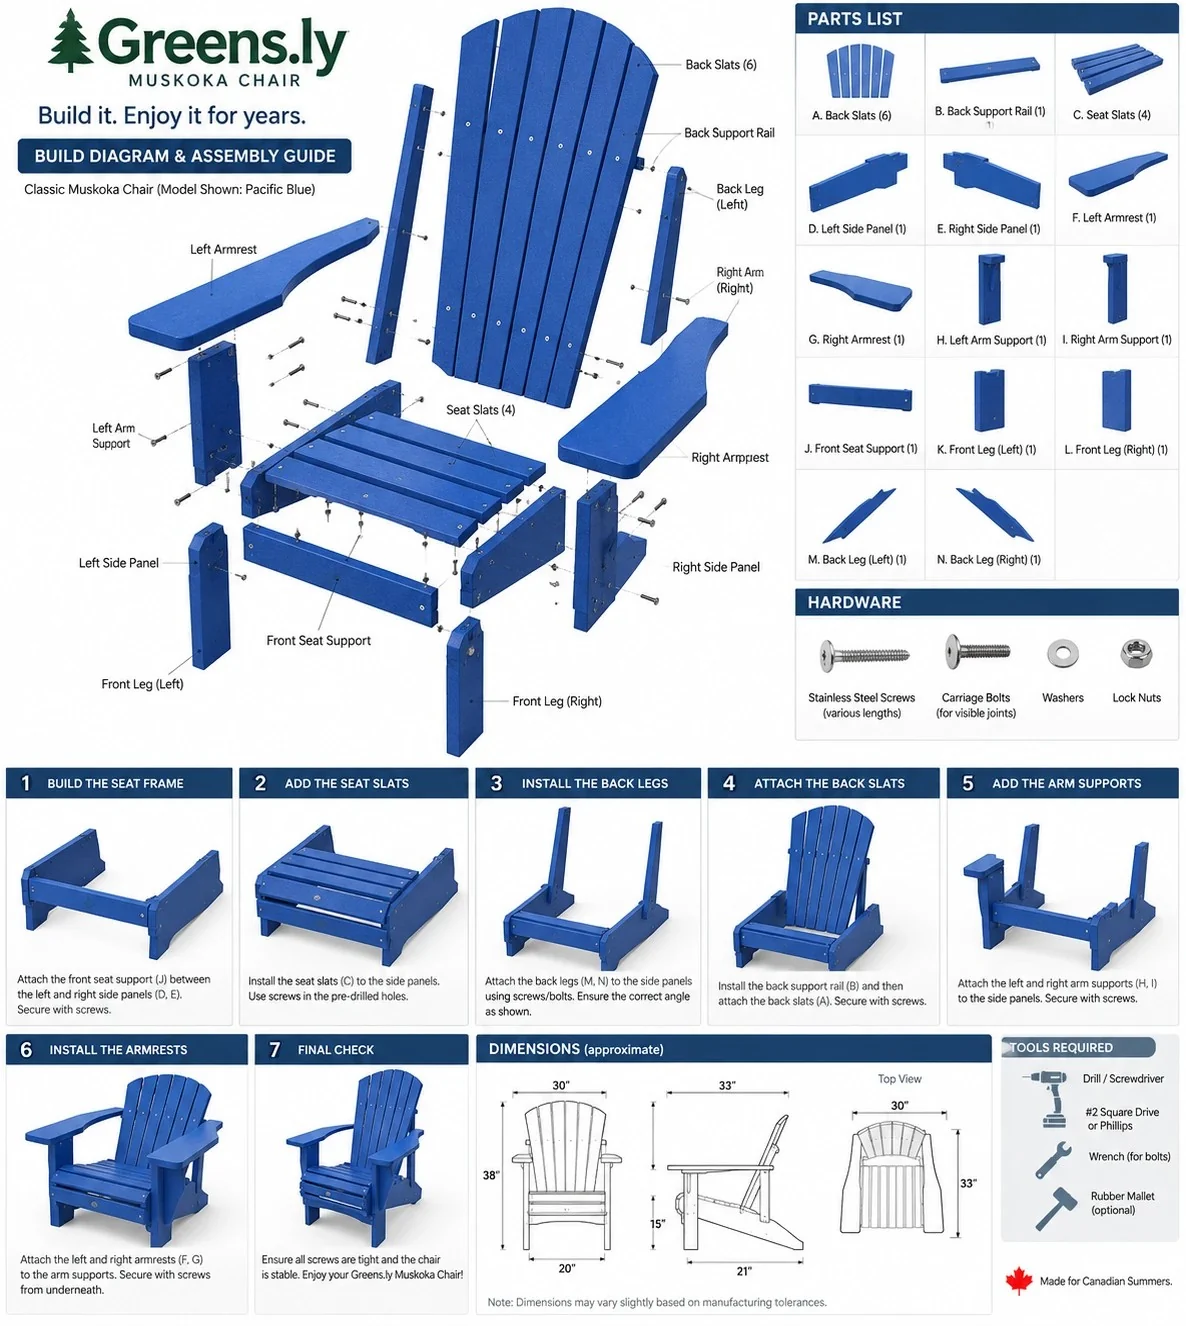
In the box
Fourteen boards, labelled A to N, a bag of stainless bolts and screws, a hex key and the sheet. Lay the boards out on the lawn or a rug in the order on the sheet before you start; it turns a puzzle into a sequence.
The steps
- The seat frame. Bolt the two side rails to the front leg board. Finger-tight only.
- The seat slats. Four slats, front to back, screwed down. The front one has the rounded edge.
- The back. Five slats onto the two back braces, fanning out from the bottom. Screw from behind.
- Back to seat. The assembled back drops into the notch at the rear of the side rails. Two bolts each side.
- The arms. Each arm sits on the front leg and the arm brace, and bolts to the back. This is the step that squares the chair.
- Tighten. Now go round every bolt and snug it. Not with a drill; by hand, with the key.
The two mistakes
Tightening early: the chair will not square if the first bolts are done up before the arms are on. And driving screws with a drill on high torque: HDPE holds a screw beautifully but it will strip if you overdrive. Use the clutch, or finish by hand.
The ottoman and table
Five minutes each, same idea.
If a piece is missing or marked
Email us with the board letter. It ships from Texas the same week; nobody has to send anything back.
Questions
Do I need any tools?
A Phillips screwdriver or a drill with a Phillips bit. The hex key for the bolts is in the box.
Can one person assemble it?
Yes. The heaviest piece is the assembled back, which one person lifts easily.